
This guide covers installing the conda packaging system miniconda into your
own space. This has a number of advantages, including full controll on package
versions. Due to the large nature of the files, it is suggested not to install
into your home directory if you are using NFS home directories. At CSX conda
should be installed on the GPFS file system in the directory
/GPFS/xf23id/users/<uid> where <uid> is your user ID.
To create a directory on the GPFS system, do the following:
[swilkins@23id1-srv2 ~]$ sudo mkdir /GPFS/xf23id/users/<uid>
[swilkins@23id1-srv2 ~]$ sudo chown <uid> /GPFS/xf23id/users/<uid>
[swilkins@23id1-srv2 ~]$ sudo chmod 750 /GPFS/xf23id/users/<uid>
Where <uid> is your userid.
Install the latest miniconda. This can be done by downloading the latest miniconda binary installer from conda.pydata.org.
Once the file is downloaded make the file executable and run the installer.
DO NOT let the installer change your .bashrc file.:
[swilkins@xf23id1-srv2 ~/Downloads]$ chmod u+x Miniconda3-latest-Linux-x86_64.sh
[swilkins@xf23id1-srv2 ~/Downloads]$ ./Miniconda3-latest-Linux-x86_64.sh
When prompted, enter the GPFS path for the install location, for example:
Do you approve the license terms? [yes|no]
[no] >>> yes

Miniconda3 will now be installed into this location:
/home/swilkins/miniconda3

  - Press ENTER to confirm the location
  - Press CTRL-C to abort the installation
  - Or specify a different location below

[/home/swilkins/miniconda3] >>> /GPFS/xf23id/users/swilkins/miniconda3
PREFIX=/GPFS/xf23id/users/swilkins/miniconda3
To add the miniconda to yor path, edit your .bashrc file with your
favorite editor and add the following lines.
if [ -e "/GPFS/xf23id/users/swilkins/miniconda3" ]; then
    export PATH="/GPFS/xf23id/users/swilkins/miniconda3/bin:$PATH"
fi
Substituting swilkins for your user ID. To enable the path, now source your
.bashrc file:
[swilkins@xf23id1-srv2 ~/Downloads]$ source ~/.bashrc
Once miniconda is installed and in the path, configure conda to use the NSLS-II anaconda cloud server:
[swilkins@xf23id1-srv2 ~/Downloads]$ conda install anaconda-client conda-build --yes
[swilkins@xf23id1-srv2 ~/Downloads]$ conda config --add channels anaconda
[swilkins@xf23id1-srv2 ~/Downloads]$ conda config --add channels latest
[swilkins@xf23id1-srv2 ~/Downloads]$ conda config --add create_default_packages pip
[swilkins@xf23id1-srv2 ~/Downloads]$ conda config --add create_default_packages anaconda-client
[swilkins@xf23id1-srv2 ~/Downloads]$ anaconda config --set url https://conda.nsls2.bnl.gov/api
[swilkins@xf23id1-srv2 ~/Downloads]$ conda config --remove channels defaults --force
[swilkins@xf23id1-srv2 ~/Downloads]$ conda update --all --yes
Congratulations! You now have a personal installation of miniconda connected to the NSLS-II anaconda cloud server. Now you can create a new environment for doing your analysis. To create and activate the environment type:
[swilkins@xf23id1-srv2 ~/Downloads]$ conda create -n analysis python=3.5
[swilkins@xf23id1-srv2 ~/Downloads]$ source activate analysis
(analysis)[swilkins@xf23id1-srv2 ~/Downloads]$ conda install dataportal
(analysis)[swilkins@xf23id1-srv2 ~/Downloads]$ conda install ipython-notebook
To get your custom environment to work with the notebook server, you have to
create a kernal file in your .python/kernel directory (where
my-analysis-kernel can be any name you wish to know this kernel by):
(analysis)[swilkins@xf23id1-srv2 ~]$ cd ~/.ipython/kernels/
(analysis)[swilkins@xf23id1-srv2 ~/.ipython/kernels]$ mkdir my-analysis-kernel
Now create a kernel json file to let the notebook server know how to run this
kernel. Create a file kernel.json in the directory my-analysis-kernel
with your favorite text editor such as:
{"argv":["/home/swilkins/miniconda3/envs/analysis/bin/python3.5",
        "-m", "IPython.kernel", "-f", "{connection_file}"],
  "display_name":"xf23id1-srv2 - Analysis Conda Env",
  "host":"xf23id1-srv2"
}
Where the path /home/swilkins/miniconda3/envs/analysis/bin/python3.5 should
point to the path of python in your home directory conda environment.
display_name should be a nice name for this kernel, and the host is the
computer on which the kernel should run.
If all works OK, the new kernel shouls show up in the kernel list on notebook.nsls2.bnl.gov
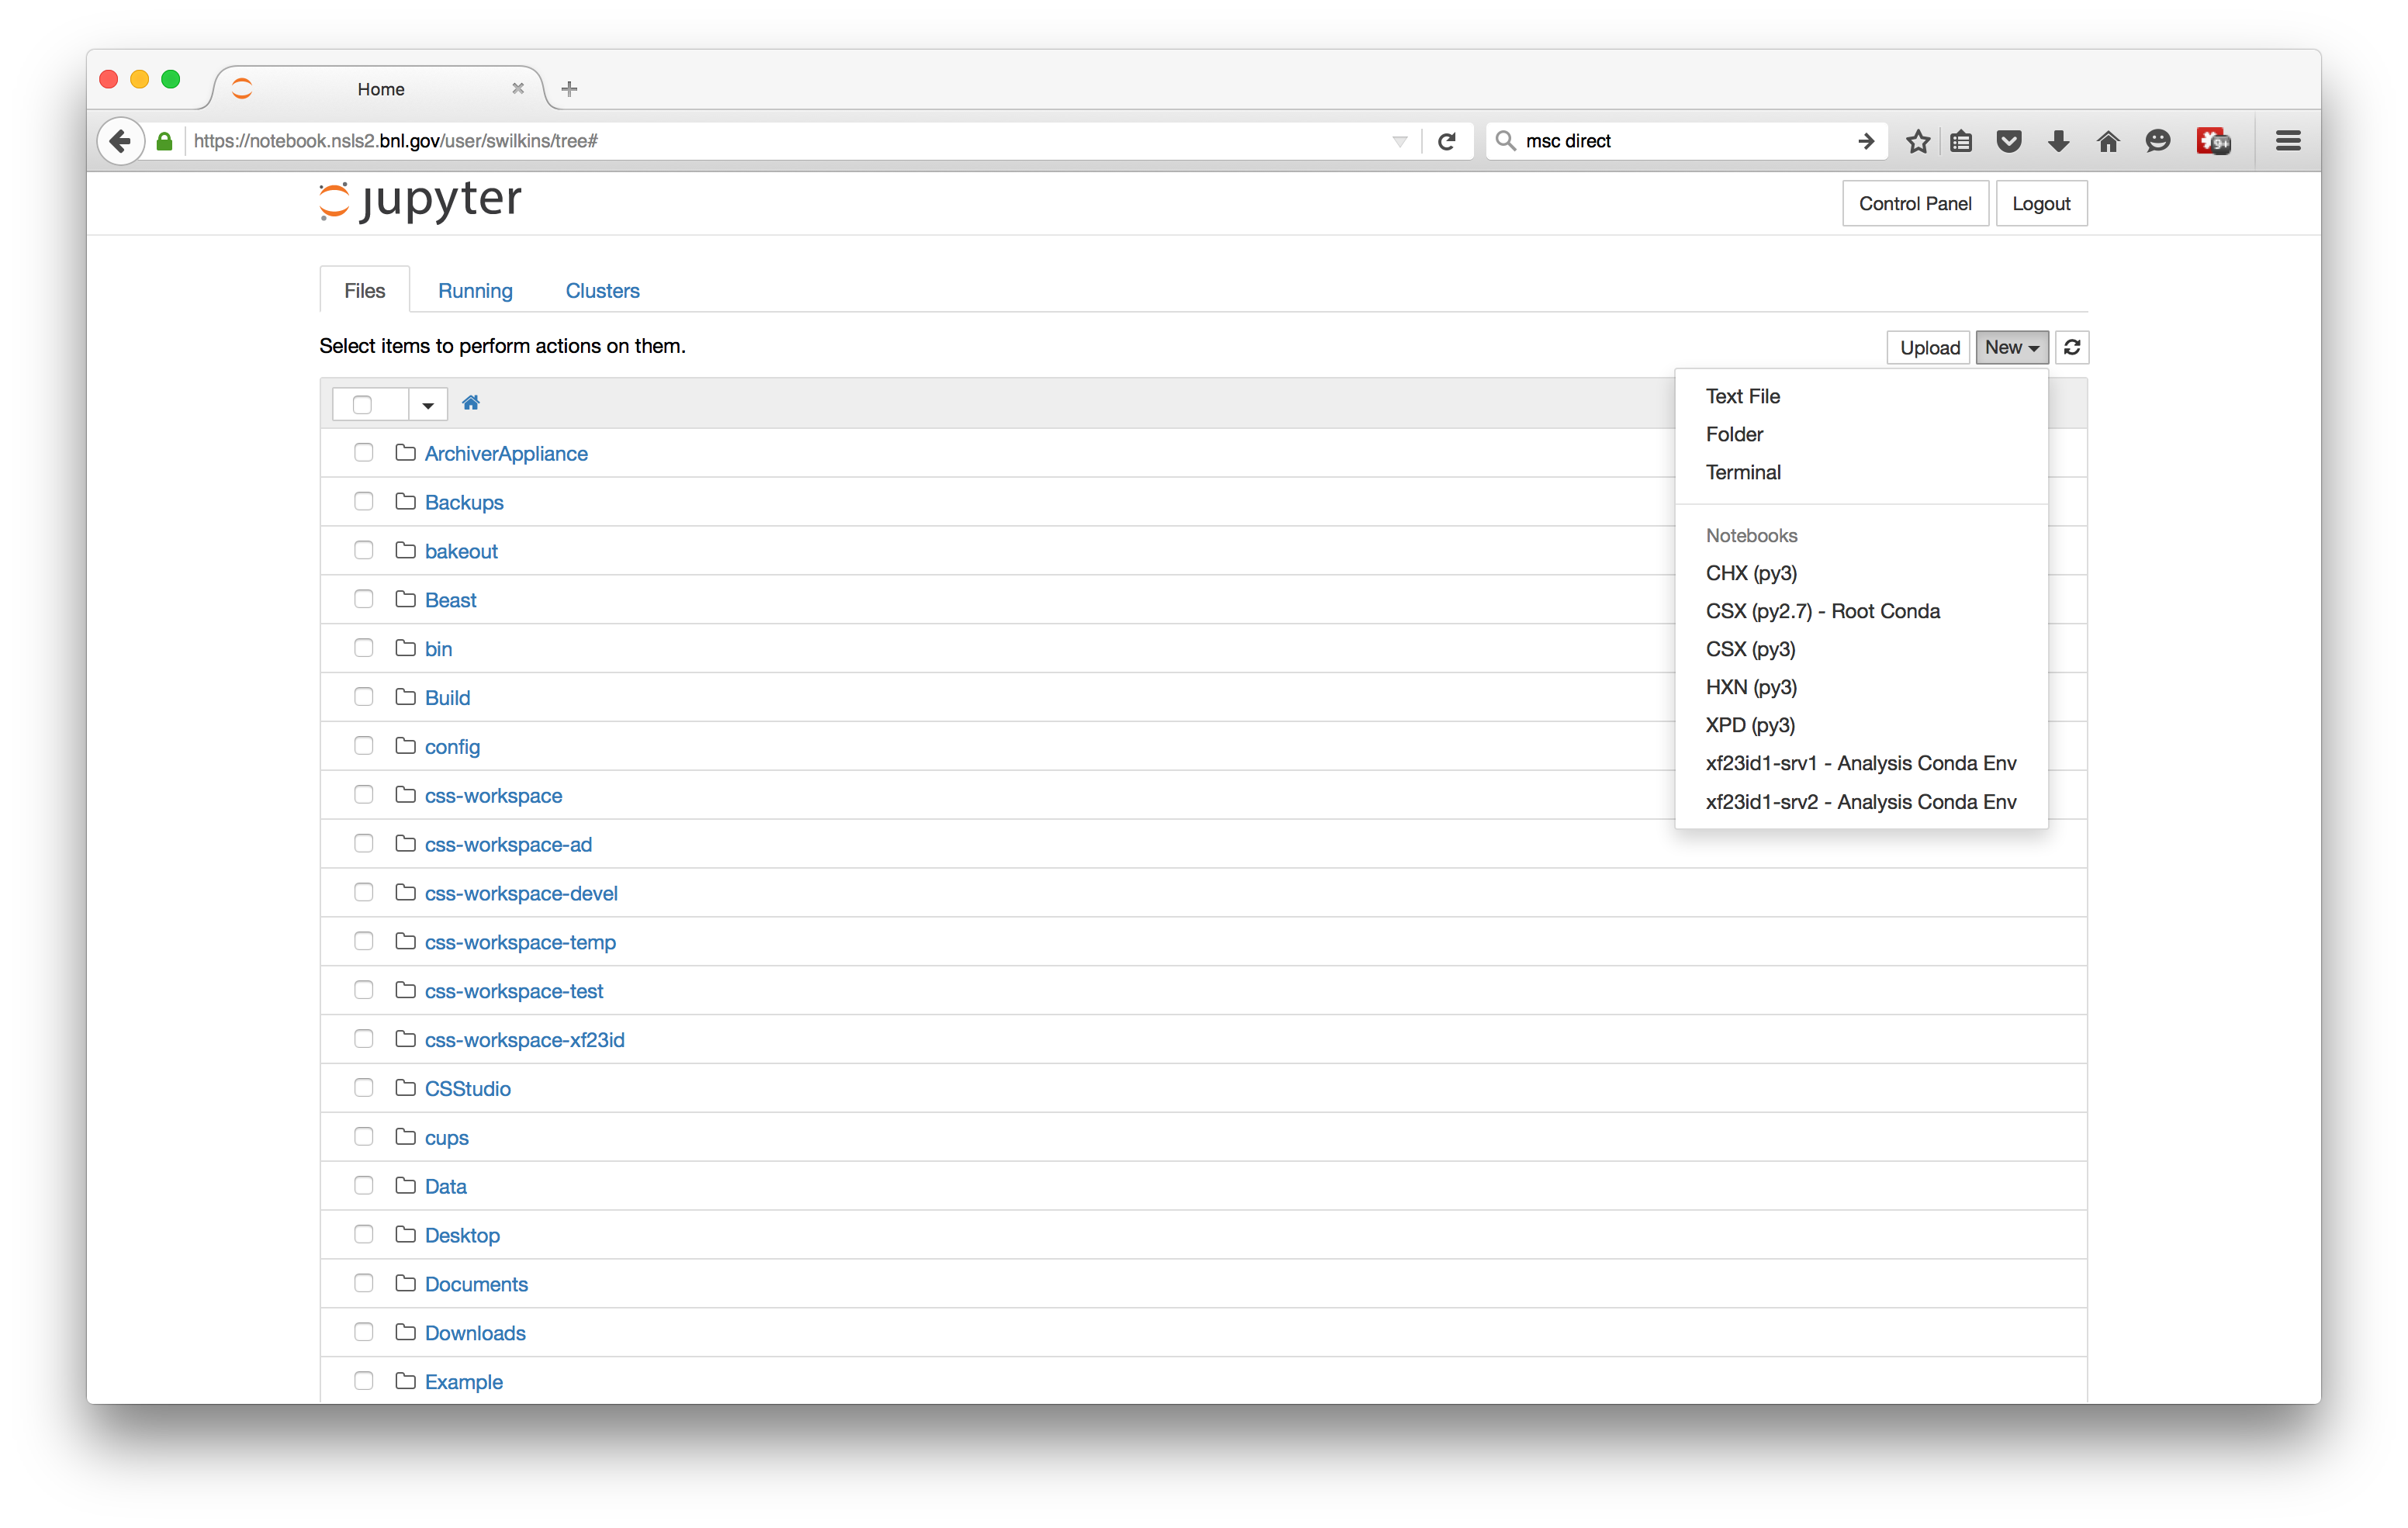
Running a new notebook from that option will now run a kernel in the new conda environment:
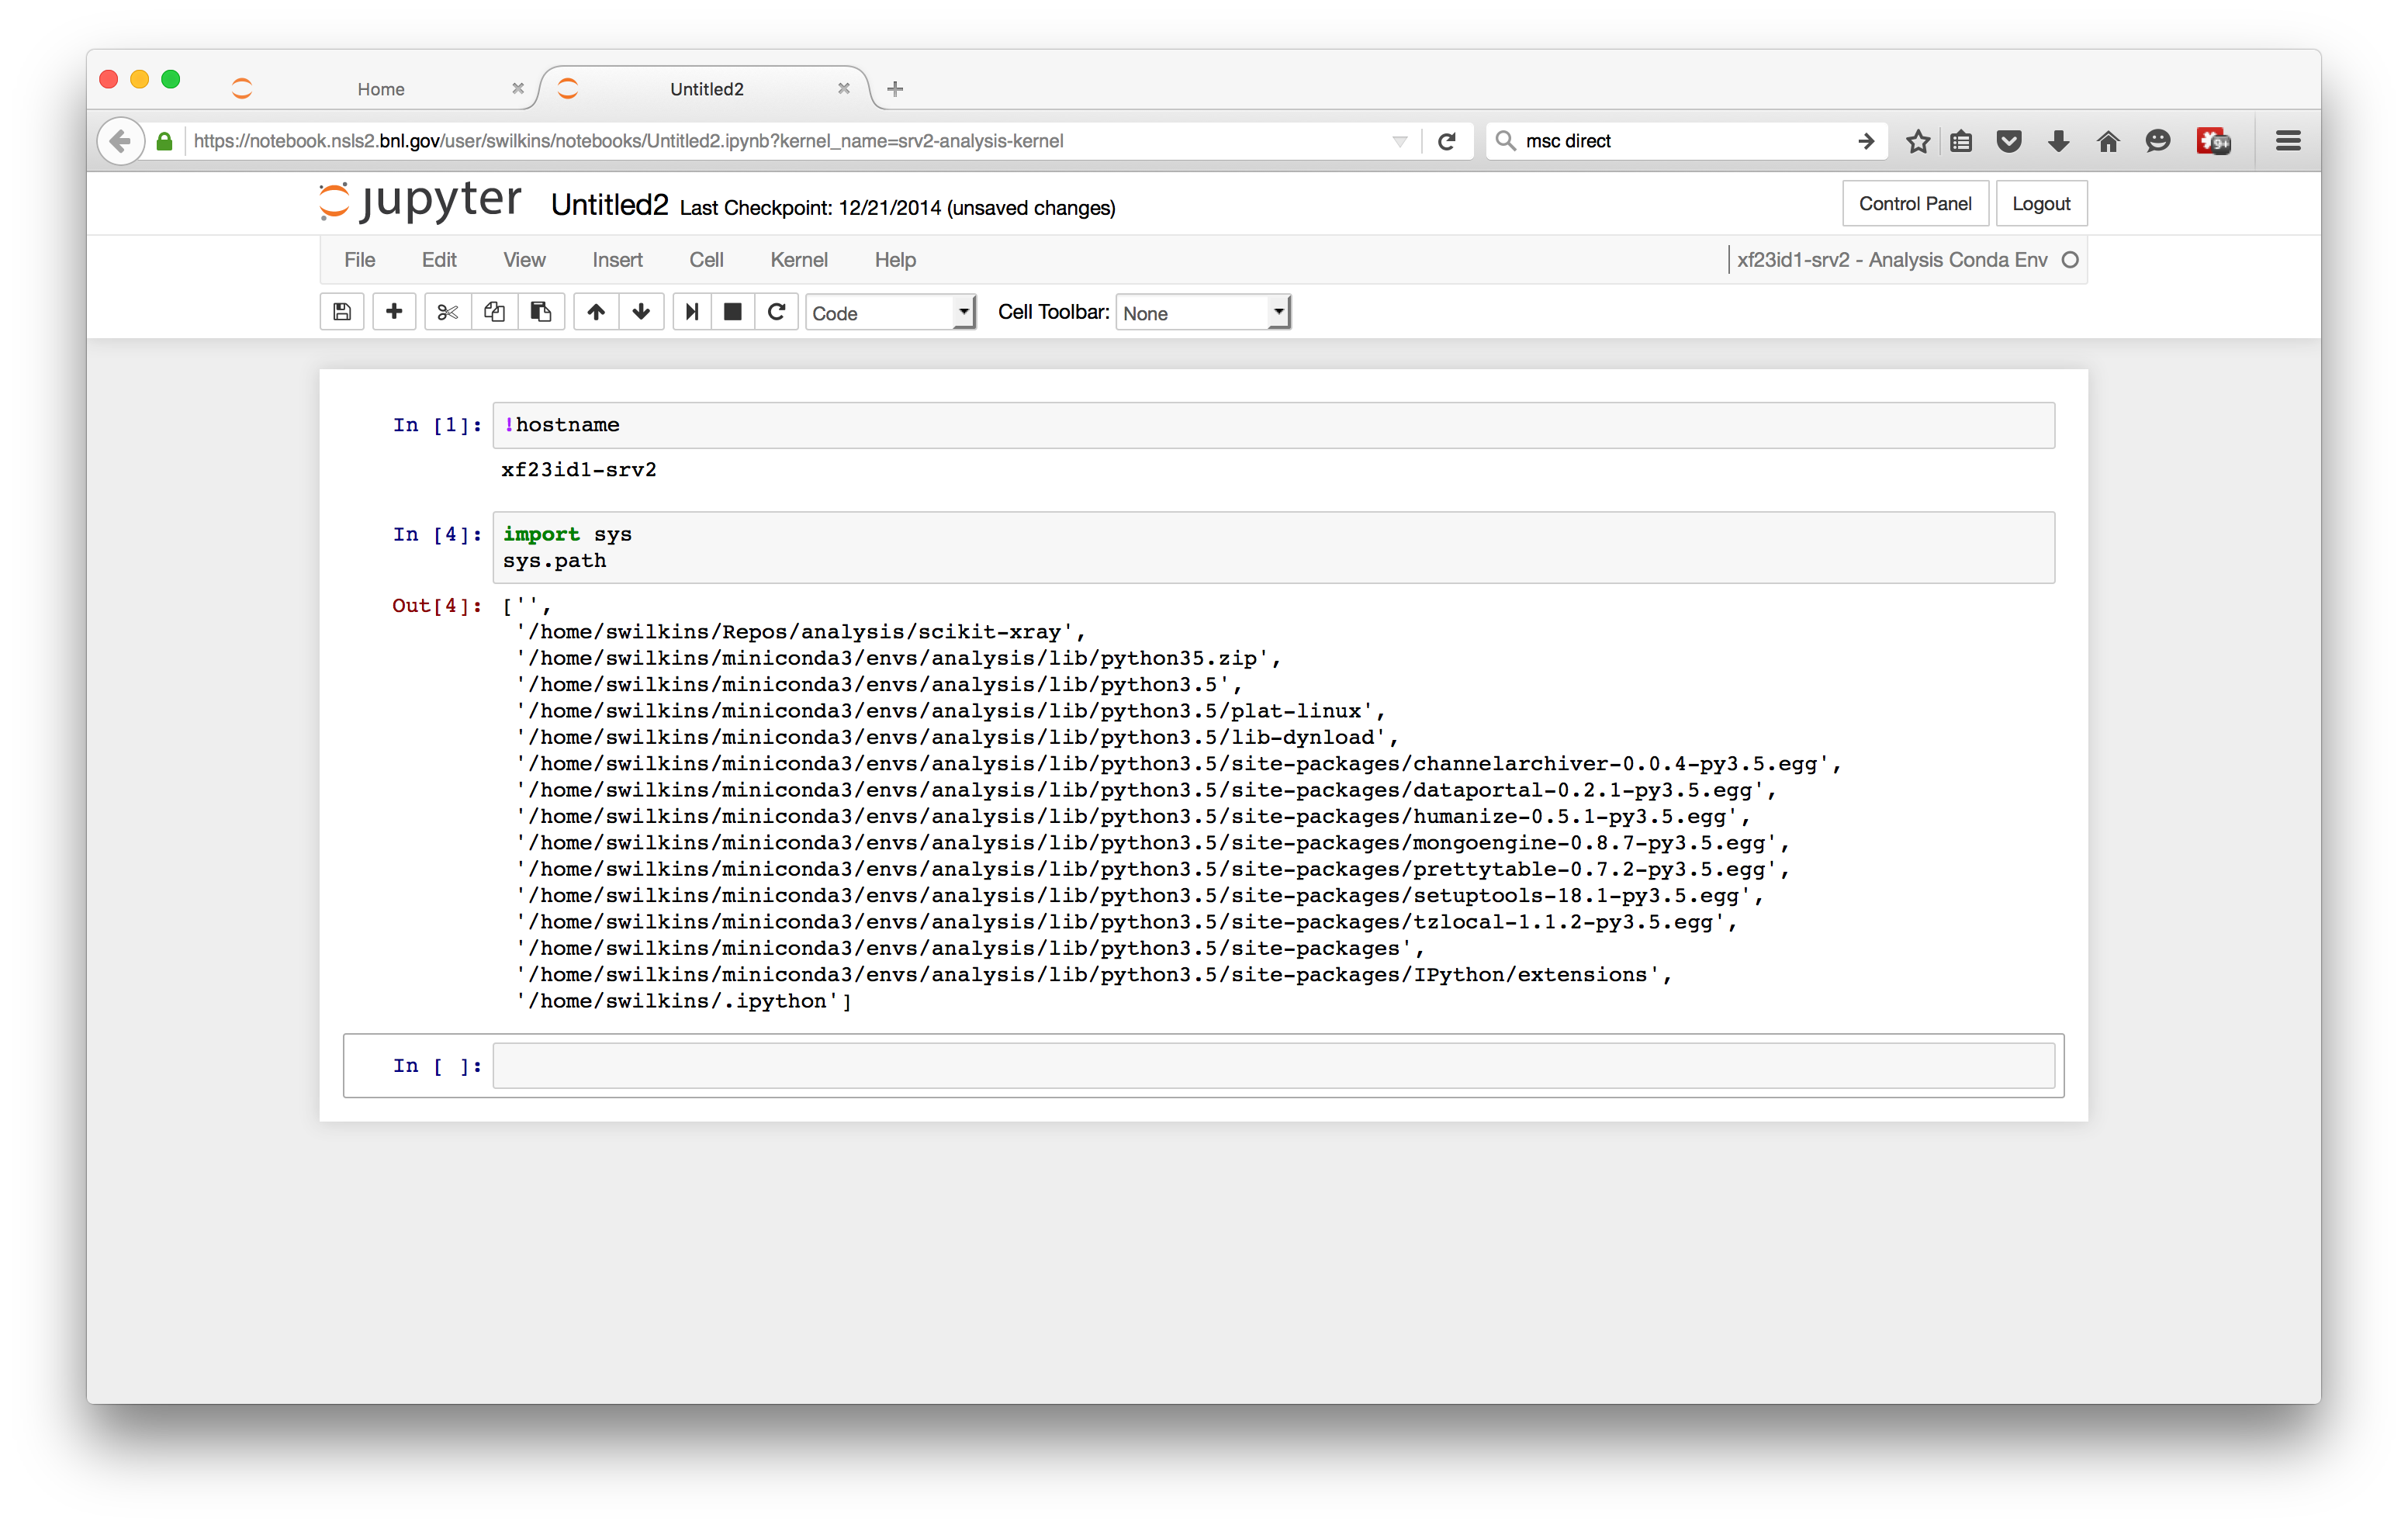
Congratulations!!